
This week for learn to use 3D printer and make 3D scan .3D Printing also known as additive manufacturing (AM).goals of this week make a 3D design and print it,that can't be made subtractively and scan an object
In our fablab using 3d printer ultimaker 2

I started to playing with settings . I really want some directions for setting the machine to get a decent looking prints . I got many ways to get good quality print but in my opinion it boils down to these four points:
For testing printing quality of our 3D printer we download .stl format test file form http://www.thingiverse.com/thing:1363023 . Downloaded design contain geometric shapes and angles .after complete the printing we measure the sizes of geometric models on printed model (show below) and compare with design

Next assignment is make a 3D design and print it.
I decided to use Blender 3D soft were for design a nonobstructive 3D structure, I already have some previous experience with the blender.
Blender is a professional free and open-source 3D computer graphics software product used for creating animated films, visual effects, art, 3D printed models.
Then I start with a simple design of 3D slimily structure with hole inside the structure .in this structure has internal channels and spherical-like shapes, this is something that cannot be made using CNC mill, absolutely no way to create subtractively as a single piece, because no tool can not move fully over the surface of this designs spherical shape and complex to make cavity inside the solid spear
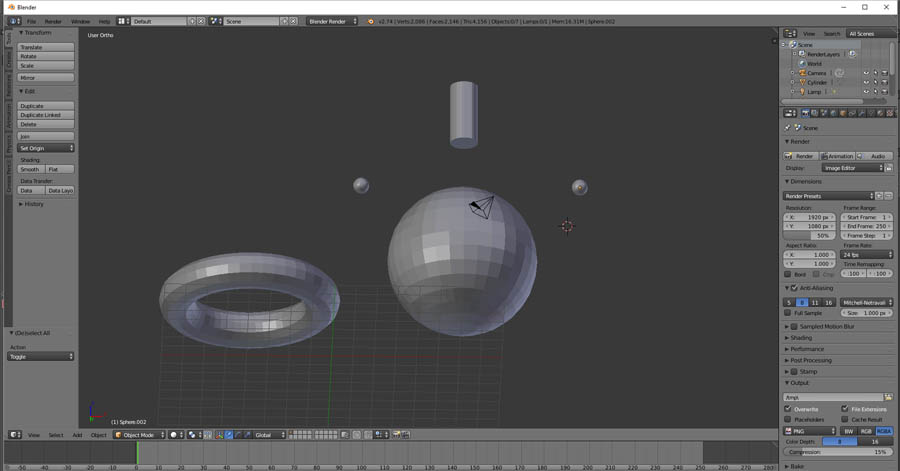
Then I start to design smiley structure. For this, I add three sphere mesh, a torus mesh, and cylinder mesh ( for getting add menu "Shift + A" )


smiley 3D by rashid on Sketchfab
Exported .stl file open with cura . Cura is 3D printer software for slicing models to G-Code format., Developed through open source collaboration. It's optimized for the Ultimaker 3D printer, but it works fine with any printer based on the RepRap model .Then .stl file export it into .gcod format. Then I make the change on printing quality forget a good quality print with small time
Then print it

download .stl file
download .blend file
Then I start design a simple alarm clock using blender. show the design steps on my video


download .stl file
download .blend file
Problem

Don't give any support for printing this shape due to this incline portions of design not get perfectly. After printing, I shape damaged area using a knife I from injured area using a knife
I am using Microsoft Kinect (line of motion sensing input devices) for 3D scan . I tried two softwares (k-scan & skanect) with kinect for scanning
problem faced : software is not detecting the censor ( Kinect ). the error occurred because of, ther is no drivers installed for kinect . This problem solved by installing correct driver
First i decided to scan my friend jaseel .I used Kinect with k-scan to do this scan 

then I scan a statue .for this I using the software skanect

After the scanning it export to .stl format ,
download scanned .stl file
Then it open with blender and make some changes like remove unwanted parts

Edited Statue by rashid on Sketchfab